sewing CHARLIE DARWIN
Check out how sewists are using Charlie Darwin sewing patterns!
(this is a new feature, so please be patient while we get more submissions for all the different designs!)
Made your own garment using a Charlie Darwin pattern? We’d LOVE to see it! Submit your photo & get a special thank-you promo code here -->

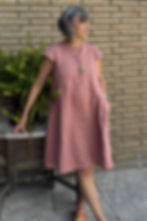

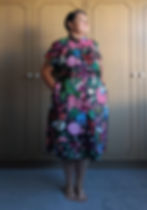
Lise
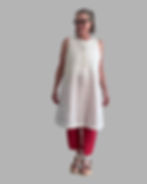
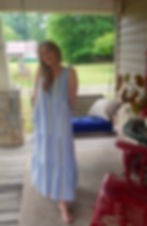
This 100% linen dress came together so very easily. Lining the top gives beautiful edges to the neckline and armholes. I didn’t want to make the buttonholes so I stitched the right over the left front with a topstitch and sewed the buttons thru both layers. I lowered the front neckline by about 1”. I added 1.5” to the hemline.
I wish I had linen in pink tones but had to use cotton for the back. I also used this cotton to line the front, back and cap sleeves.
100% linen is recycled from one of those large baby wraps.

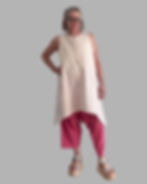
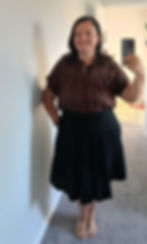
Siena
I used a medium-weight linen and love the quality feel of it. Changed up the pants to a skirt version. Taped the pant panels together with a 1" overlap. Shortened the pattern pieces to 33" in length. This dress is so comfortable. I want to make another one. What I would do differently next time is to raise the pocket placement a bit. Maximum one inch. As a dress, I would change the back of the bodice to be a straight seam without the overlap at the bottom, gap and button. There is enough material and enough head space on the bodice that I shouldn't need a zipper closure at the back.
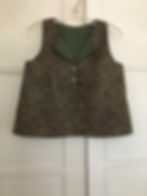


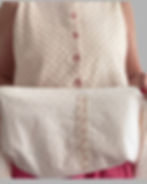
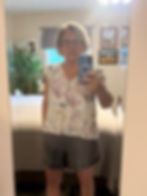
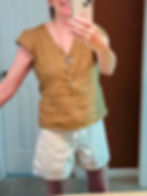
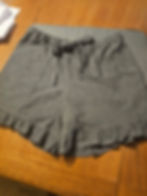
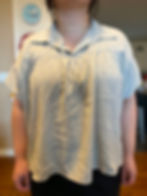
Miki
This is the crop top with the round neckline, made with 2 cotton fabrics and shell buttons that I reversed so the less shiny side shows. I have paired it with linen shorts. My vintage sewing machine only does straight stitch, so the buttonholes are hand sewn. The armscythe/shoulder line isn’t quite right on me, so I added a 2nd pair of darts, from the armscythes, after I’d already sewn on the lining. (They may get ripped out.) I used French seams on the skirt’s vertical seams for a tidy finish. The skirt front stuck out oddly, so I took in an extra triangle at the center. Upon reflection, I think I may have put the skirt side seams in the centers….

gini
Argent and Sable number two! This time I used a cotton clip-dot voile and used a cotton lawn to line both the bodice and the skirt. I made a straight size 5, knee length and added a bit of a high-low hem. These are my favorite pockets of all time.


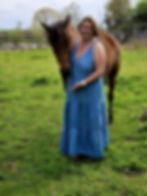
Gini
this is my first Argent and Sable and I love it. I used a mid weight textured linen and vintage buttons. I made a straight size 5, knee length version with no alterations. To me this is the perfect dress, I love the pockets and the overall versatility.
Patty
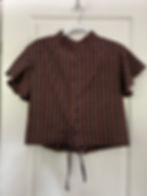
My 2nd Canary top - this version has the pointed collar and the peplum with short sleeves. This time I used a thrifted cotton check print that I love and buttons I found in my mother-in-law’s giant tin of buttons. I love that although using the same pattern, with so many options it feels like a completely different shirt from my first version. A dream to sew. Great instructions. Love, love, love.
Kim
I had so much fun making these pants. The instructions were so easy to follow and enjoyable to read. I love all the different options included with the pattern. I used medium weight linen. They fit perfectly thanks to all the sizing recommendations. I didn’t even have to make a toile! Will definitely make again, and can’t wait to try out some of your other patterns.
Patty
Loved the Canary pattern. I chose to sew the band collar and the butterfly sleeves. I decided on the cropped version but added 2” to the bottom hem to accommodate the waist elastic/tie hack. I used thrifted linen in a cute plaid for this version. This is a size 3, and I will probably go down one size on the next version. Super fun to sew. Can’t wait to wear it!

Emy
I forgot to add in my previous photo that I'm also wearing my Saltwater shorts! I have made 4 pair of these so far-they're the only shorts I wear now-may be the season to make a few more!

Emy
My Argent and Sable tops-the print is in an upcyled linen sheet. I love this pattern!


Blythe
The Argent and Sable pattern was a good one to get back into sewing garments. I did not have enough yardage for a solid color so I used 2 pieces of linen, one I had dyed with chestnuts and the other dyed with acorns.
For me, the pattern had a few challenges. I am 5’ tall so I used the height adjustment calculator to shorten both pieces. I worried that the armholes might be too long, but they were fine; however, the bodice ended up a little shorter than I would have liked (should have made a muslin!) The overall length was about right for above the knee, but I shortened it another 2 inches for a more summery feel. (In retrospect, I should have only gone 1 inch - but only because I am not used to the shorter length). I also shortened the pockets, which worked out great.
I struggled a bit with folding the seams over 1/4” and a 1/4” again (that is a lot of visible top stitching!).
The burrito roll worked like magic! I just trusted the directions and went for it. Amazing!
And then it came time to do the button holes - and my sewing machine broke. I tried to fix it, and then it would only sew in reverse. Agh! So I dug out my mother‘s vintage Singer Featherweight machine, which I first learned to sew on in the 50s. I opened it up, greased the gears, oiled it, and what a revelation! So much easier to sew with than my Husqvarna, which sounds like a rattle trap in comparison! It only goes forwards and backwards, but it sews like a dream! So I am grateful for that little disaster! I ended up doing the button holes by hand and appreciated the meditation of slow sewing.
Final answer: I absolutely love this dress! I can’t wait to make another one to try out some of the variations.
Thank you, Leah! You are awesome!
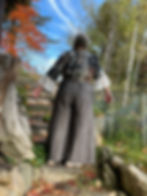
fishfibers
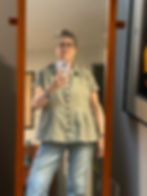
Made with contrasting leg panels. Supposed to make me look taller. I am 5' 2" and shortened the top portion 2 inches. Next time I need to narrow the shoulders. Sewn with linen and raw silk. Made to attend a wedding. I wanted to be comfortable and it was.
@fishfibers
I made the Sanctuary to wear for a wedding reception. I wanted to be comfortable! It is. I used a gray heathered linen and a raw slub silk Plaid from Thailand. I thought that by adding the front panel of the pant to match the top Plaid portion, it would elongate my silhouette. Perhaps the top could fit me better in the shoulders? I am onlly 5' 2" so I did take some length out at the join off the top to pant, but next I will make a casual short version and will need to narrow the shoulders a bit so it is less blousey.

Leslie
I made the Argent & Sable crop top in 100% cotton and used decorative buttons from my stash to add a little interest.
This is the perfect length to wear with my loose fitting pants and skirts when I don't want to do a front tuck with my shirt.
When I got to the "Burrito " part, I did a little happy dance that I had chosen the sleeveless version for my first attempt. It went so well that I'm looking forward to getting my first linen and making the dress!
Mary
My top is argent and sable in ginger linen. I just noticed I am also wearing the Olene pattern shorts in a muslin toile.
Elisabeth
For this outfit, I used the Ladybird for the jacket, and LoveNotions Cadence for the dress. The Ladybird was made from a linen/rayon blend. I made the knee length version, with the ties. I omitted the collar, and bound the neckline with a self fabric bias band. I also angled the front hem up about two inches, towards the button bands. I’m looking forward to wearing this!


Leslie
I hesitated buying the Sanctuary pattern at first because I struggle fastening things behind my neck, BUT this is not only easy to get on and off, it is secure enough that I don’t worry about it opening at the wrong time. I did make my loop slightly longer than the suggested 3”, and used a shank button. It is made from a cotton gauze, so it is flowy in all the right places, and soft enough that I could sleep in it. Even with the 500 miles of seams, I look forward to making this again and again! 😅


Leslie
After a 30 year hiatus from sewing, I was inspired by the Saltwater pattern to pull my machine out of storage and get to work! Not only was it fun to sew, but for once, a finished garment actually fit me!!! I loved it so much that I gave my old machine away and upgraded to a new one!
I have now sewn this 3 times. Twice from thrifted cotton duvets, and once as pajamas from a soft cotton. I can’t wait to make the next ones in linen!

Camilla
I took the Argent and Sable pattern and just made it a little bit longer then the original design. I used 100% linen and for the lining a very soft cotton, so its lovely to use without a bra too🤭

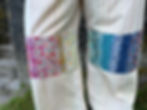

queensamarah
This was a project to feature my Liberty of London scraps from mask making days. I pieced together the patches with irregular pieces to create a rainbow spectrum, which was emphasized by the Fableism Skinny Stripe pant base.
Katie
Argent and sable as a maxi skirt!
I loved the full dress pattern, and when Leah mentioned oh so casually in a vlog about making it a skirt I was onto it.
It's the skirt and pocket pieces, but I added a rectangular waistband for a wide elastic casing and that was it! So easy, so swooshy, and the elastic waistband compensated for the height adjustment that I would have otherwise done in the dress bodice.
I'm wearing in a matching set made with some home dyed cotton.

Lindn
Leah convinced me of the awesomeness of linen. This is my second time sewing Finch (the first was a prototype using inexpensive polyester/polyester-cotton woven fabric). For this iteration, I used 100% linen from Mood - lightweight linen chambray - heather black- minerva collection. Made mistakes, avoided the mistake from the first version but created new mistakes with this iteration. I think it’s still wearable for casual hot days. I used the selvedge edge as the shirt hem. Watching and rewatching the videos while looking at the annotated illustrations in the booklet helped!


Emy
Is it possible to LOVE an article of clothing? If so, I love everything about this pattern and the clothing I've made so far with it! The fit is absolutely PERFECT! The construction of the dress and shirt I've made so far is PERFECT! I missed out on the deadline for testing this pattern and was waiting for it to come out, and now I'm glad I missed out because I ended up up being so inspired by the other testers. I especially love the version Lesa made with the raw edge hem-I copied it. I also bound the pocket edges backwards so that there could be a raw edge showing there too. I know this will be my go-to dress for the summer, and can't wait to make another one. Thank you Leah for a super pattern design!


Leslie
What a fun pattern!!! I used an old (40 + years) cotton sheet that had been stored in my parent's closet for the fabric. It is lightweight, but durable enough that it should last another 40 years... at which point I will be 105 and probably still wearing it. 😁
I made a slight modification to the front bodice by doubling the fabric to give me a little more coverage at the bust.
I love the relaxed fit and the ability to adjust the ties depending on how I want to wear it. Thank you Leah!

Andrea
I have made the Finch blouse in three variations so far. All the materials are used textile sheets or I cut them out of an old loose skirt.
I made a long-sleeved blouse with a Peter Pan collar and two short-sleeved blouses with a stand-up collar. I lengthened the bottom, which I like better.
The video material helped a lot because I have rarely sewn blouses before. I think I managed to choose a good size, size 3 seems pretty good for my body shape.
I had two challenges, one was the Peter Pan collar, I messed it up a little but it's not noticeable and I have to cut a little from the back of the neck so that there is not too much wrinkle in the material in this part and I had to adjust the collars for this. A third thing is that in my case the shoulder line falls further back from the neck towards the shoulder than it should.
I have to pay attention to these little things and shape them, otherwise the pattern is very good.
Now I'm going to make them from other materials, they'll be great for summer, they'll be nice and airy to wear. I'm going to love them.

Cathy
I used a waffle cotton, I love the colour, I popped some elastic around the bottom to sinch it in a smidge, cause the waffle has some much volume,
I found the pattern was easy to follow and understand.
I just love this top, and have another 2 cut out already
Katie
Finch is a stunner, I love to make in a matching set for a faux dress option, or for separates.
Despite years of thinking I needed a deep V, the high neck is actually my favourite part!

Katie
I made a maxi length Argent & Sable in a yarn dyed cotton in a super zesty lime to wear on a tropical holiday.
The V neck pulls straight over my head so the buttons are purely decorative and stitched through.
Anna
Cotton, collar shirt with no buttons


Janet
I absolutely love sewing with linen. For this project I used IL019 ASPHALT FS Signature Finish Linen from Fabric-Store.com. I made it specifically to wear as a long open jacket over a linen tank top and linen pants. The home printed pattern pieces came together quickly (with no trimming!!) using a glue stick, what a time saver! Instruction booklet was great, clear and thorough.


SamInFrance
Actually made Olene shorts as a wearable toile but no option for Olene available here.
Struggled with joining inner to outer front panels. Sewed both upside down & flat felled, but was able to cut out panel and replace with a new cut panel without losing any width.
My measurements put me bang centre of a size 7, but as photos show the shorts came up very small even though I only used 1cm seams. Used calculator to add length adjustments for my 5'8" height. Will try again with a size 8 although did find waist very high which might not suit my very short body. Did reduce frill at top to 1cm.

Kate
Happy Release Day OLENE Pants in a fine cord paired with a Finch Top in a medium linen.

RKathie
The FINCH is beautifully versatile! I have broadcast this 21 configuration lovely design to everyone I know, particularly to Catherine's Sewing Room, the sewing group I recently joined, with great response and feedback from all sides. As you can see with my first sample make, I have all these fabrics mostly in heavier cotton lined up to make all the varieties, patterns from mushrooms, rabbits, and lovely rainbow scales, nautical! I plan to expand to linen soon! Thanks to the lovely creative maker of CDT, also for the wonderful Darwin concept, making it even better with plant dyed linen, as well. I am in awe!


Hendrik de beer
I got the Gypsy Moth Ultimate sewing kit and was super grateful that it came with everything I needed to make this beautiful dress. It gave me confidence as a beginner to be able to start and finish a project, and on the plus side my wife looks amazing in it and loves it.


hendrik de beer
The saltwater shirt was a fun and easy pattern to fallow. I used a medium weight line fabric. My wife loves the the sleaves and fit. I would recommend this to any beginner.


Linda
My version of the Finch pattern. I sewed the size 4 which ended up being way too big so then I went through a process of trying to alter it to fit my body. I i’m fairly new at sewing so of course I messed it up when I tried to alter it. I thought I could just make it smaller by sewing up the side seam and under arm seems but nope, that’s not the way to do it. I had to kind of wing it to get it straightened out and finished up, but I think it turned out pretty good in the end. It’s sewn in 100% cotton fabric. First time sewing a collar, and I also added the ruffles to the collar. I love this pattern. Next time I will definitely size down.

Katarina
Made my first Finch recently. Straight off the pattern, no changes. Ruffle on collar, short sleeves. Best pdf pattern assembly system ever! Really like the outcome - just not on me. Next time I’ll go down one size and also make it a bit longer - then I think it will be a better fit for my tall and straight frame. Sewn from cotton remnant, thrifted buttons.


Indy
Finch Success!
This is my toile, made with African wax print. For the fabric, the purple is near the selvage on both sides, and the magenta is in the middle. It feels heavier than quilting or kona cotton, but lighter than canvas. My bust measurement was 39" so I went with size 6, but I will go down a size next time. I felt a little excess fabric under the arm. I'm not sure if it was due to the width of the final garment or the depth of the sleeves.
When sewing the top front and back bodice pieces together along the shoulder seam, I attempted a felled seam. It looks okay, but I clearly didn't know what I was doing. I did the top stitch along that shoulder seam which resulted in three lines of stitching on the inside of the garment and two on the outside. How? Nobody knows.
I decided to skip the top stitching along the gathered edges. I just didn't trust myself to do it neatly, plus the purple thread I chose was unforgiving.
For the sleeve and bottom helm, I did about 1/2", turned over twice instead of 1/4" because I'm not confident/steady enough yet for such small hems.
I have to admit that my band collar is a little bit wonky-donk, (yes, that's an official sewing term) but I wasn't up for unpicking it. I think somehow the curved part of mine, closest to the front, lost some of its curve. Maybe I didn't turn it out fully. My top stitching went awry as well. I'm contemplating how I might be able to sew that curved part by hand next time around.
For the most part, I only used the video tutorial and only glanced at the written instructions a few times. In the video, it looked like Leah had interfacing added to the part of the collar stand where the button holes would go, but I couldn't remember that it was called interfacing for the life of me, so I just added a strip of Swedish tracing paper. Newbie sewing adventures.
I'd never sewn a placket or button holes before. Apparently my machine can do it, but I was too afraid to try, so I sewed them by hand thanks to a Youtube tutorial from Carly B and I LOVED the process. They're not beautiful button holes, but that gives them their charm.
Thanks for such a great pattern! I look forward to sewing this up in linen :)

Kelly
This is the Finch top with 3/4 sleeves and band collar with sevedge edges on the collar stand, bodice and button band. It was lengthened 3 inches at the bodice front and back. Made with Charlie Darwin hand dyed linen.

Hilary
This is just my practice finch using quilting cotton. Used a slightly different piece for the upper bodice and kinda love that. Also didn’t add buttons to it yet, but may keep it that way. Getting ready to make my “real” version with a lighter weight cotton! Amazing pattern with so many options!


Teresa
I love my Finch! I love it so much that I have another one cut! The pattern is easy to follow and the see is super satisfying. 10/10 highly recommended

Emily
I used some white linen that I had leftover from another project. This was the very first time that I have ever sewn a blouse. The first time for any kind of collar, button placket, button holes, too!
I didn't make any adjustments other than not putting a button on the stand collar.
Next time I make this I will add a ruffle on the front where the upper and lower bodice meet, change to the peter pan collar and make it long sleeved. Autumn is coming, right? I will likely make one size up because I have giant shoulders and lengthen it slightly.
I love how much information is in the pattern. Since I am a novice sewist I need all the instruction I can get. Maybe three times over.

Emydee
The front of my short Sanctuary

Emydee
I LOVE this pattern so much! This is my short version-I know I'll be wearing it a lot this summer. Matter of fact I already fabric for my next one! Thank you for creating such a lovely pattern with such straight forward instructions

Jeanna
I had so much fun making my test Sanctuary outfit. I loved that the instructions were so clear. I’m a beginner. The only thing I struggled with was adjusting the pattern too much my height. I used the calculator, however I think I took too much off the leg panels on the top :( I’m super excited to make the real deal though!! Thank you so much Charlie Darwin for sharing your talent!

Emily
I’m a new to sewing garments and have loads to learn. Sanctuary is my first non-circle skirt garment. I loved the video tutorial. I highly recommend it for other newbies. This actually my mockup, but it came out so cute I’m going to wear it! I can’t wait to get started on my linen version.

Nancy
I'm a curvy girl and the Sanctuary looks good even on me! I made mine in purple/grey linen. I extended the back center by 1 1/2" on each side to give myself a wider overlap for the single button closure so the back did not show my bra. That worked like a charm. I made mine with even larger pockets....I really love huge pockets :) So comfortable and striking. Love it!


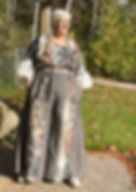
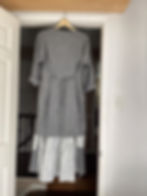
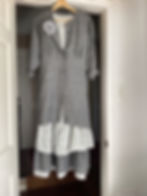
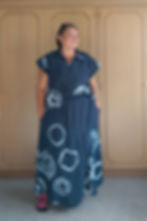
Emy
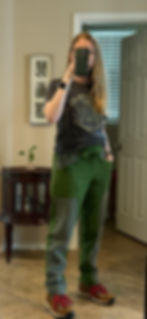
I loved making this jumpsuit!I've been sewing for a long time but this pattern was somewhat challenging and stretched my skills just the right amount. I made it in the light indigo in the full length version. I used some Indian block print from my stash for the pockets and the neck binding and button loop.I found a vintage button with a low shank that I used rather than the shell button I ordered. I I also hacked the placement of the elastic a bit - by making the bodice a little shorter and the legs a little longer so the elastic casing was actually made from the legs rather than the bodice.I don't like anything around my waist-the result made me look like I have long legs-for the first time in my life. I also cut the iron on tag in half so the washing instructions are on the inside but I loved the evolution part of the design and ironed it on to one of the front leg panels so it could be seen. I may go back later and add some embroidery around it. I think I'll try the short version next. The directions and fabric were perfection! The little girl in one of the photos is my granddaughter and I made her dress too! Thank you for creating this beautiful comfortable and flattering pattern.


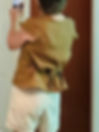
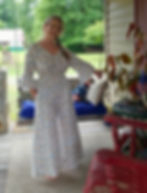
Leah!
(hi friends! It's Leah from Charlie Darwin-- I'm testing out this new photo gallery feature!) For my jumpsuit, I used 100% linen, in undyed white. I definitely had to make a few samples before I got to this final design that was ready for everyone to wear! I show behind-the-scenes of my iterations in this youtube video, if you're interested!: https://youtu.be/hK7wvP3NhSU
Next time I make this, I want to try doing some color blocking on the pants and bodice, and/or add some tassles to the seams of the pant legs for some extra drama!
Made your own creation from a Charlie Darwin pattern?
We’d LOVE to see it! Submit your photo & get a special thank-you promo code!